
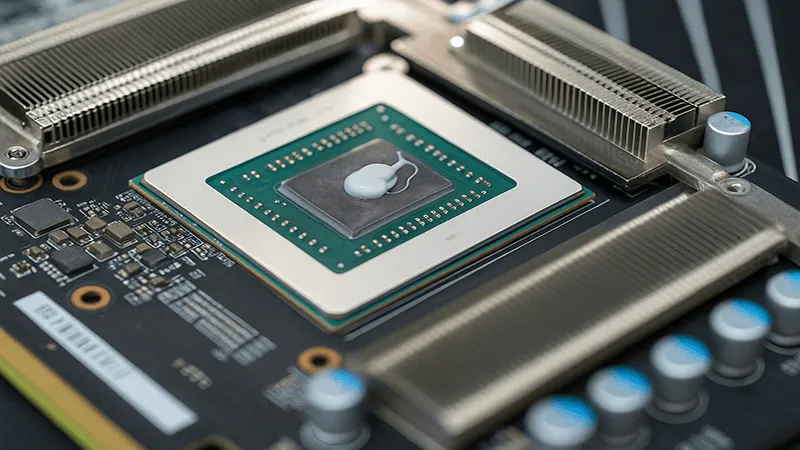
A CPU works hard every time you power on your computer. Heat builds up over time between the processor and its cooler. That gets worse if old thermal paste has dried or cracked. That thin layer of thermal paste matters. It helps maintain thermal conductivity and keeps your system’s performance stable. When it breaks down, heat rises fast. The CPU starts to throttle or shut down to protect itself.
Cleaning and replacing it isn’t just maintenance. It’s prevention. You don’t need expert expertise or special tools. With isopropyl alcohol, a lint free cloth, and a meticulous hand, you can clean the CPU and remove old thermal paste. This guide explains how to remove it, what materials to use and how to clean the CPU effectively for better cooling, smoother operation, and longer life.
Why Do We Need to Clean Old Thermal Paste?
Every CPU needs good cooling to stay healthy. The secret behind that cooling isn’t just the fan or the cooler. It is the thin layer of thermal paste between the processor and the heat sink. That layer handles the hard work of moving heat away fast enough to keep everything running smoothly. But over time, that old paste starts to break down. It dries up, cracks, and stops heat from moving like it should. And when that happens, performance suffers.
Let’s see exactly why cleaning matters, what happens when old thermal paste fails, how poor contact affects performance and why a fresh layer of thermal paste can extend the life of your components.
Old Thermal Paste Stops Doing Its Job
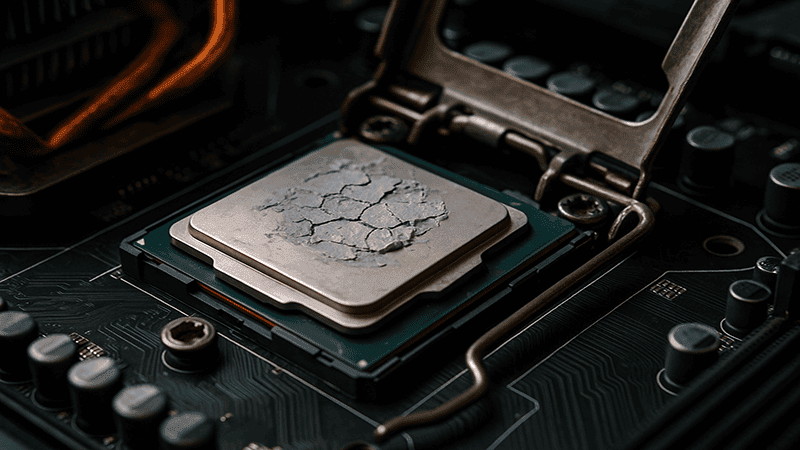
When thermal paste is new, it spreads perfectly between the CPU and heat sink, filling microscopic gaps that air can’t reach. This creates an efficient transfer of heat. As months go by, that thermal grease loses flexibility. It dries out, leaving tiny spaces that trap air which we know is the enemy of good cooling. The result? Heat gets stuck, and the CPU starts to run hot.
Weak Thermal Conductivity Hurts Performance
Poor heat transfer doesn’t just make the system hot. It pushes the cooler to work harder, which means louder fans, slower performance, and more power draw. A simple clean and fresh thermal paste application can fix that immediately. With solid contact between the CPU and heat sink, heat escapes efficiently again.
Cleaning Extends the Life of Your Components
Excess heat wears out parts faster. Not just the processor but the whole system. The CPU cooler can’t help if the thermal paste is old and dried up. That buildup of heat takes a toll.
Removing the old thermal paste gives your CPU a clean, even surface. This makes it easier to apply new thermal paste in turn leading to better cooling. It’s like changing the oil in your car. Skip it and damage creeps in.
Fresh thermal paste and a clean surface keep the CPU cooler working right. Your processor runs cooler. Smoother. Longer. Small job. Big impact.
What to Clean Thermal Paste With
Before cleaning your CPU, gather the right essentials. Using the wrong ones can damage the surface or leave residue that ruins thermal conductivity. The goal is simple. You want a smooth, clean contact point for the new thermal paste and efficient transfer of heat to the cooler.
Isopropyl Alcohol (90% or Higher)
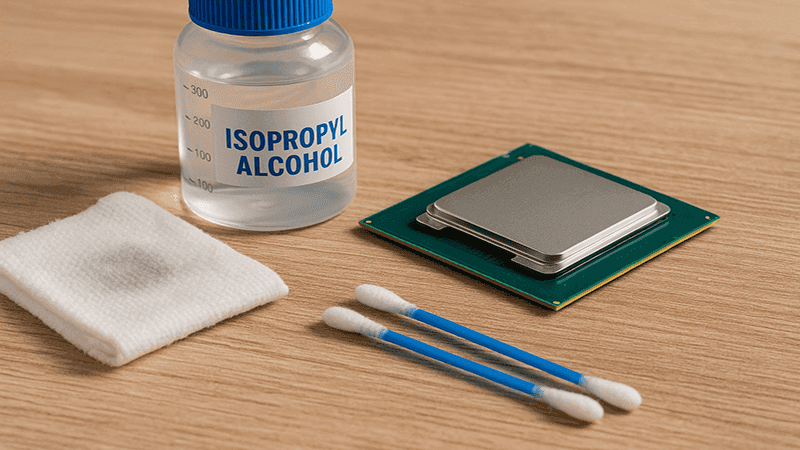
This is the safest and most effective cleaner for old thermal paste. The substance breaks down grease rapidly and evaporates without producing any residue. Use 90 percent or higher concentration. Anything less often contains water that can stay behind. The National Center for Biotechnology Information highlights that isopropyl alcohol evaporates at a faster rate than ethanol-based cleaners and also leaves less residue. It is the industry standard for electronics cleaning.
Lint Free Cloth or Microfiber Cloth
A lint free cloth is essential. Regular tissues or rough fabrics shed fibers, which interfere with thermal conductivity. Microfiber also works well because it traps residue and prevents scratches on metal surfaces. Using the right cloth keeps the CPU base smooth for better contact later.
Cotton Swabs
For small edges and corners, cotton swabs do the trick. They help remove any bits of old thermal paste that stay after the first wipe.
Paper Towel (Only If Necessary)
A paper towel is not your first choice. It can scratch the surface or leave fibers behind. But if that is your only choice, fold it tightly. This helps cut down on lint. Use it only to remove excess thermal paste. Never wipe directly with it.
Each of these tools is useful. Together, they make sure your CPU and sink are clean, residue-free, and ready for a fresh layer of thermal paste.
Once you have them ready, you’re set to start cleaning the right way.
Best Way to Clean Thermal Paste

Cleaning the CPU may sound complicated but it’s really simple. You just have to be patient and have the right touch. This is how to do it without destroying anything:
Step 1: Shut Down and Cool Off
Turn everything off. Unplug the system and wait a few minutes. You don’t want to touch a hot CPU cooler. Once it is cool, disconnect it gently from the motherboard. A small twist helps loosen the bond around the socket.
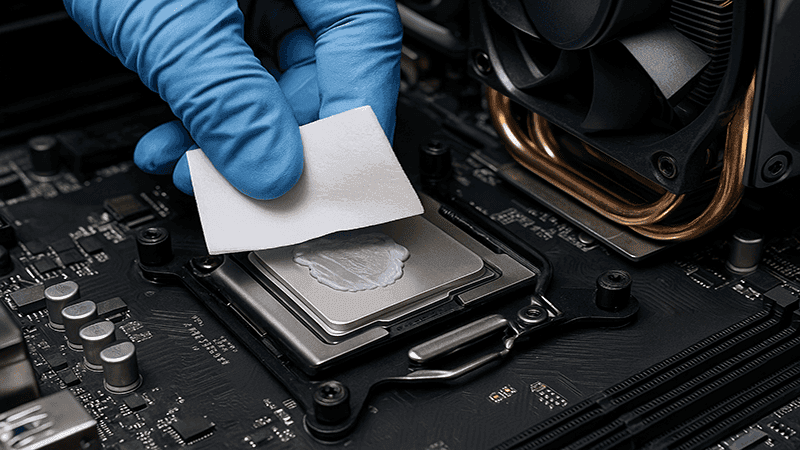
Step 2: Remove the Old Stuff
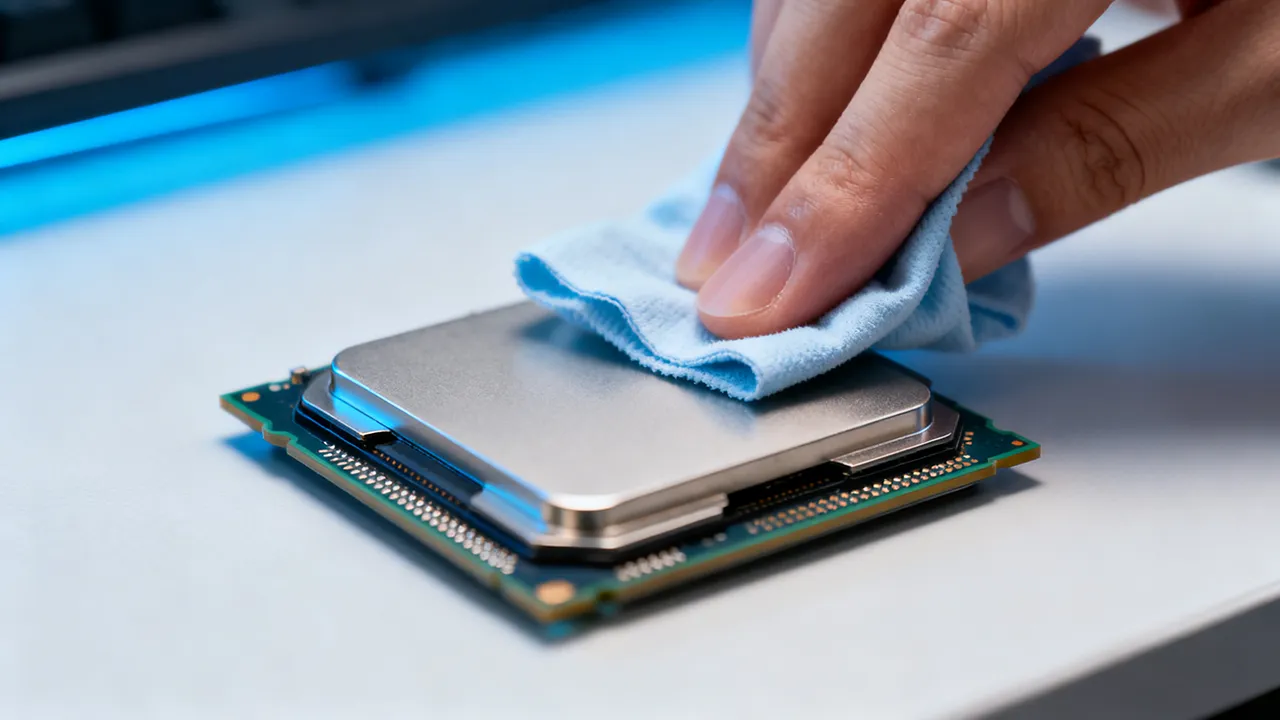
Grab your lint free cloth with a bit of isopropyl alcohol and start to remove thermal paste from the top of the CPU. Go slow. No scraping. The rubbing alcohol softens the old layer, making it easier to lift off. Wipe until the surface looks clean and shiny.
Step 3: Clean the Cooler Too
Don’t forget the base of the CPU cooler. It needs the same treatment. Clean thermal paste from it with the same cloth. If you miss that part, the new thermal paste won’t spread evenly when you reinstall it.
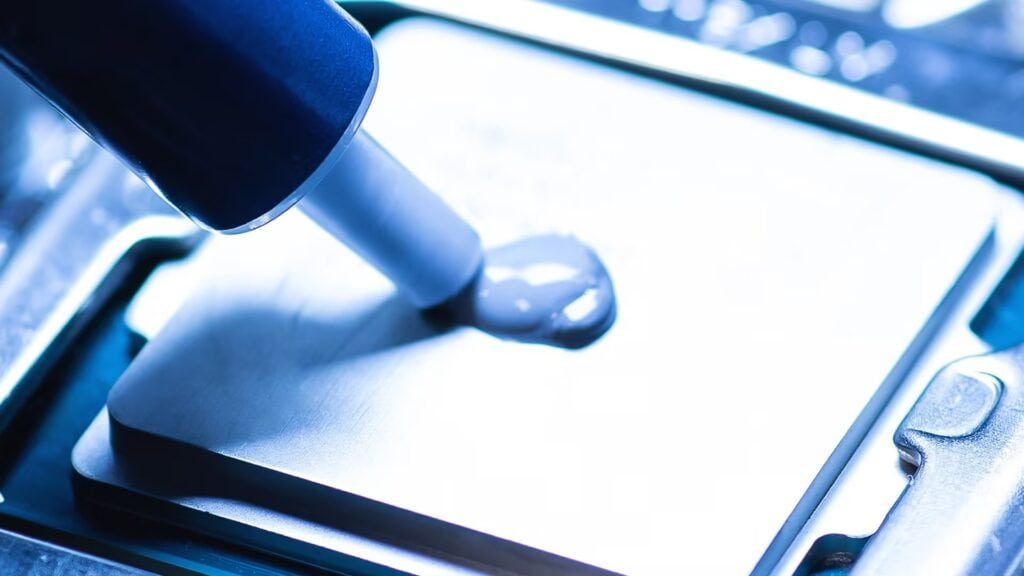
Step 4: Add the New Paste

When both surfaces are dry, apply thermal paste right in the center of the CPU. Use the correct amount, just about the size of a pea. That’s enough for full coverage once the cooler presses down.
Step 5: Reattach with Even Pressure
Drop the cooler straight down onto the CPU. No tilting, no wiggling. Just line it up and press with light, even pressure. You are not forcing it, just making sure it sits flat. Lock it in, plug things back in, and you are done.
That simple routine goes a long way. The process requires three basic elements which include a clean surface, thermal paste and a steady hand to achieve CPU cooling and system stability.
Wrong Way to Clean Thermal Paste
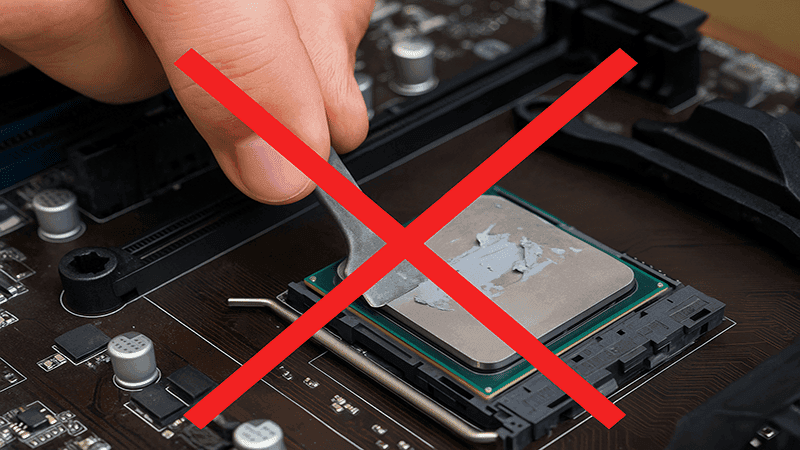
There is the right way to clean a CPU, and there is the way that ruins your gear. Most mistakes happen because someone is rushing or using whatever is lying around. Wrong materials, too much pressure, or skipping steps. That can mess up your old CPU cooler or worse, fry your CPU.
Using the Wrong Materials
Never grab a paper towel or rough cloth. They might look soft, but they leave tiny fibers and can scratch the surface. Even small marks on the metal reduce contact with the heat sink. That means less heat transfer and higher temperatures. Use a lint free cloth instead, always.
Rubbing Too Hard
Some people think more pressure means a better clean. It doesn’t. Excess force can bend parts or break delicate solder points. Apply light, normal pressure only. Let the isopropyl alcohol do the cleaning. You’re not scrubbing a pan here. You’re cleaning precision components.
Skipping the Edges
Don’t forget the edges of the CPU and cooler base. That’s where most traces of old thermal paste hide. Leaving them behind creates uneven seals and poor cooling. Be careful, take your time, and make sure every corner looks clear and dry.
Reusing Old Paste
It might seem harmless to reuse old thermal paste if it still looks okay. Don’t. It’s already dried and lost its cooling efficiency. Fresh thermal paste ensures proper heat transfer and protects the CPU from overheating.
Cleaning computers isn’t about speed. It’s about precision. Be patient, be gentle, and you’ll keep your heat sink and CPU running like new.
Ready to Apply What You’ve Learned?
If you’ve followed the steps, your CPU should be clean and ready to go. When you apply thermal paste the right way, you’ll see the results right away. Lower heat, quieter fans, and smoother performance. Even the best cleaning job works better when you use the right tools.
At Jiujutech, we make new thermal paste and thermal compounds that keep your CPU cooler for longer. Each one is tested for efficient heat transfer and steady performance under load. Whether you are fixing your home PC or building something for work, our products make the job safe and easy.
When you reapply thermal paste, use a good brand and make sure your CPU cooler is fitted tight. Take your time and make sure the paste has the correct application.
Check out Jiujutech’s thermal materials and see how the right paste can help your system stay cool and run better every day.
Frequently Asked Questions
- Is 70% isopropyl alcohol ok for cleaning a CPU?
Yes, it’s fine to use. It will also safely wipe off the CPU thermal paste. The only downside is that it has more water, so it dries slowly. If available, 90% or higher isopropyl alcohol can be used. It dries quickly and doesn’t leave residue.
- Can I remove thermal paste without rubbing alcohol?
You can, but it is risky. Other cleaners could scratch the outside and damage the socket. Stick with isopropyl alcohol. It is safe for electronics.
- How do I properly clean off old thermal paste?
Cut the power, detach the CPU cooler, and gently remove thermal paste with a lint-free cloth. Don’t rub hard. Follow these instructions for a smooth finish before you apply thermal paste again.
- When should I reapply thermal paste?
A good example is every 1–2 years or when upgrading. If you remove the cooler or replace parts, reapply new thermal paste for the correct bond and temperature balance.

