

Quick Summary: The Modification at a Glance
| Feature | Specification |
|---|---|
| Goal | Reduce Battery & Logic Board Temps by 10-15°C |
| Method | Bridge internal chips to the aluminum chassis using thermal pads |
| Critical Thickness | 1.5mm (BMU) & 2.0mm (NAND) - Precision is key |
| Difficulty | Medium (Requires pentalobe driver & patience) |
| Primary Risk | Case bulging if pads are too thick (>0.1mm deviation) |
| Success Metric | Delayed thermal throttling during 4K rendering |
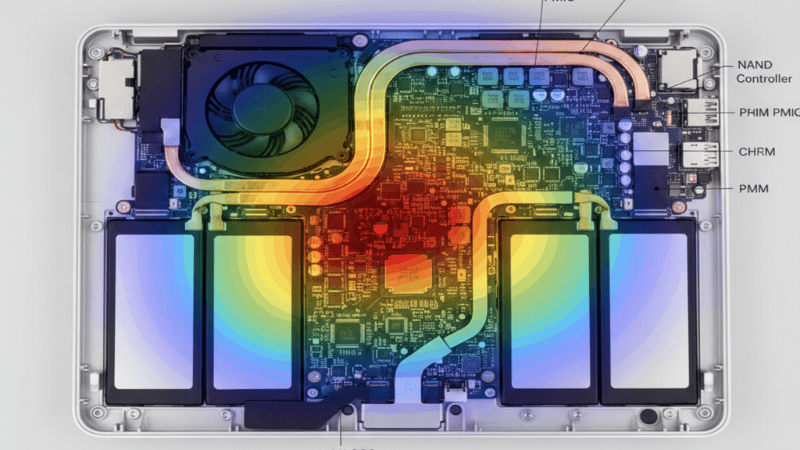
The M1’s Silent Thermal Problem
Imagine you are rendering a complex 4K video timeline in DaVinci Resolve. The M1 chip is barely breaking a sweat, sipping power efficiently. The fans are barely audible. It feels like magic. But if you had X-ray vision, you would see a different, more concerning story unfolding just inches away from the processor.
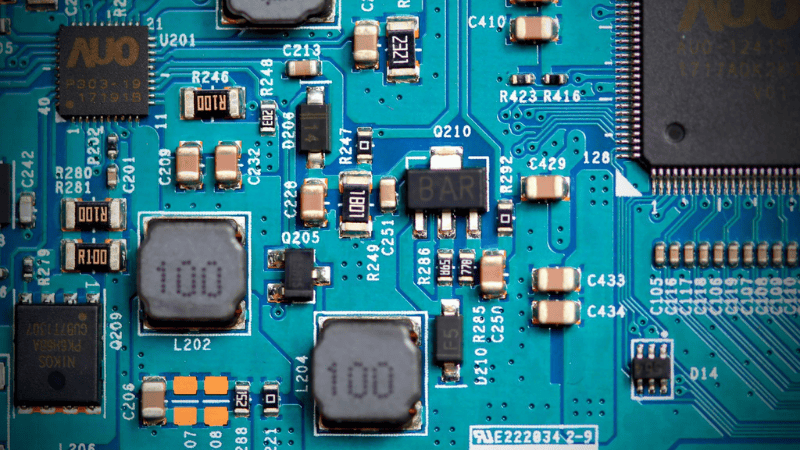
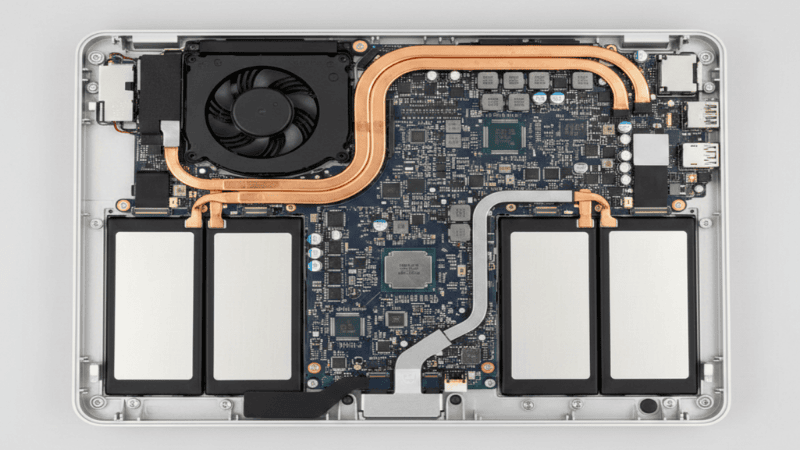
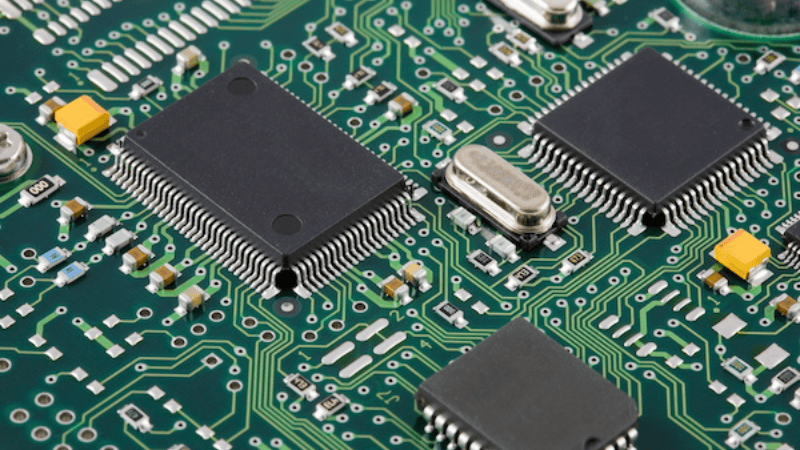
The Apple Silicon M1 is a marvel of efficiency, but its thermal design is minimalist to a fault. Apple engineers decided that silence was golden. They removed the fan entirely in the MacBook Air and aggressively limited the fan curve in the MacBook Pro to keep noise levels down. While the CPU cores stay relatively cool thanks to the active heatsink, they left the Battery Management Unit, NAND Storage Controllers, and Power Delivery chips in what engineers call a “thermal dead zone.”
These critical components sit in stagnant air, with no airflow and no connection to the primary cooling system. Under load, they act like miniature space heaters, radiating heat directly into the delicate lithium-polymer battery cells sitting right next door. It’s not a design flaw per se; it’s a consumer compromise. Apple prioritized a quiet machine and a cool lap over the long-term thermal health of secondary components.
Why This Matters for Battery Life
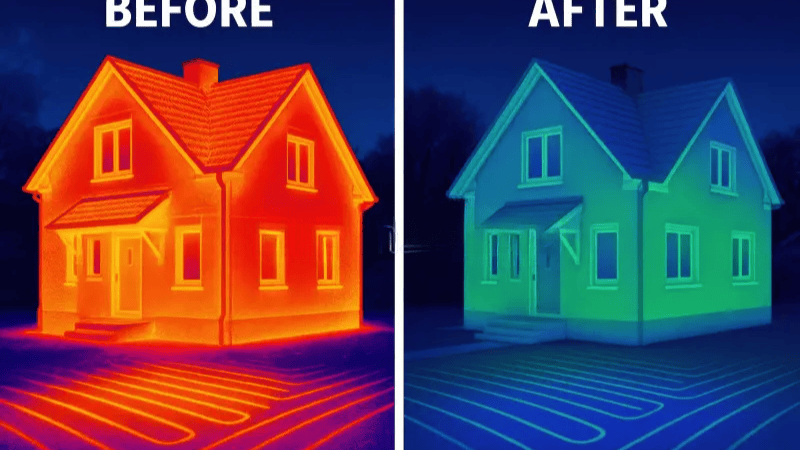
Heat is the enemy of battery longevity. Lithium-ion chemistry is volatile. Research from Battery University indicates that for every 10°C rise in average operating temperature, the cycle life of a lithium-ion battery can drop by 30-40%. When you let your Power Management ICs run hot, you are essentially cooking your battery from the inside out.
For the casual web browser, this doesn’t matter. But for the power user, the developer compiling code, the editor exporting video, or the gamer, this thermal oversight translates to swollen batteries and reduced capacity over 2-3 years. This guide isn’t just about “modding”; it’s about correcting a thermal oversight to protect your investment for the next decade.
The Manufacturing Reality
Most generic guides gloss over quality control to sell you a product. As a manufacturer at Jiujutech, we believe in radical transparency. We see the factory-level risks that drop-shippers miss.
We reject about 15% of our own production run on the factory floor. It hurts our margins, but it is necessary. Here is why generic pads found on marketplaces like Amazon or AliExpress are often dangerous for your Mac, and why “High Performance” is more than just a marketing buzzword.
The Thickness Trap and Tolerance Stack-up
Search Query Answered: “What thickness thermal pad for MacBook M1?”
The Industry Secret: Achieving a perfect 1.5mm thickness is engineeringly difficult. Thermal pads are soft; they squish during cutting. Cheap pads suffer from “calendering instability,” where the rollers that flatten the material vibrate, causing thickness to vary by ±0.1mm or more across a single sheet.
The “Stack-up” Risk: In engineering, we talk about “tolerance stack-up.” Even if our pad is perfect, Apple’s chassis varies. As noted in teardowns by iFixit, the gap between the logic board and the bottom case is not identical on every single MacBook produced.
- Scenario A: Our pad is perfect (1.5mm) + Your Logic Board sits slightly high due to solder variations = Too Tight.
- Scenario B: Generic pad is thick (1.6mm) + Your Logic Board sits high = Logic Board Damage.
Our Controlled Solution: We use digital micrometers to hold a strict ±0.05mm tolerance. We aim for the lower end of the tolerance range to ensure safety. However, we advise all users: If you feel significant resistance when closing the case, STOP. We would rather you return our product than stress your logic board.
The Bleed Nightmare
The Issue: To make pads soft and compressible, manufacturers must add silicone oil plasticizers.
The Risk: In cheap formulations, this oil is not chemically bonded to the polymer chain. When the laptop heats up, the oil separates and “bleeds” out. We have documented horror stories where silicone oil migrated from a cheap thermal pad into the screen ribbon cable or optical sensors, causing permanent hardware failure or screen flickering.
Our Solution: Jiujutech pads utilize a cross-linked polymer matrix. We bake-test our pads to ensure the oil stays locked in the chemical structure, even under extreme heat.
Foreign Particle Contamination
The Issue: Factories are dirty places. Dust, microscopic metal shavings, or conductive fibers can settle on the sticky surface of a thermal pad during the cutting process.
The Risk: If a conductive metal shaving is embedded in your pad, and you place that pad over a capacitor on your logic board, you create a bridge. This causes an instant short circuit, potentially killing the motherboard.
Our Solution: We package our consumer electronics kits in a clean-room environment and use visual inspection under LED magnification to ensure zero contamination.
Technical Deep Dive on Material Science
To understand why we chose specific pads for this kit, you need to understand two key metrics: Thermal Conductivity and Shore Hardness.
Why Higher Conductivity Isn’t Always Better
Marketing teams love to sell “15 W/mK” or “20 W/mK” pads. In reality, for a MacBook mod, these can be worse.
The Problem: Extremely high-conductivity pads are often filled with ceramic or metal particles, making them rock-hard.
The Application: You are trying to bridge a gap between a fragile chip and a flexible aluminum lid. If the pad is too hard, it won’t compress. It will act like a stone, preventing the lid from closing or cracking the chip die.
The Jiujutech Balance: We use a 6.0 W/mK formula. This is the sweet spot. It is conductive enough to move the 3-5 Watts of heat generated by a NAND chip, but soft enough to compress without damage.
The Importance of Shore Hardness
Hardness determines how “squishy” the pad is.
- Generic Pads: Often Shore 50-60 (Hard like a tire eraser). They don’t conform to the tiny capacitors on the chip.
- Jiujutech Pads: We use Shore 20-30 (Soft like a gel).
- Why it matters: When you close the lid, the pad needs to “flow” around the surface imperfections of the chip to eliminate microscopic air gaps. A soft pad ensures maximum surface area contact, which is actually more important than raw conductivity numbers.

Is This Mod For You
We want to be clear: This modification is NOT for everyone. We are engineers, not salesmen, and we want you to know the trade-offs.
The “Hot Lap” Trade-off: By bridging the heat to the chassis, the bottom of your Mac will get hot. This is simple physics: energy cannot be destroyed, only moved. We are moving it from the sensitive battery to the durable aluminum case. If you frequently use your laptop on bare skin in a hot climate, this mod might make the device uncomfortable to hold.
The Tolerance Edge Case: In rare cases, a MacBook’s internal tolerances may be so tight, or a battery may be slightly swollen from age, that even our precision pads cause case bulging. In these specific instances, we recommend not forcing the mod.
Warranty Reality: While the Federal Trade Commission protects “right to repair” in the US, a Genius Bar technician seeing non-stock parts may look for reasons to deny service. The good news? Our pads are non-adhesive and removable.
Data Analysis
We ran controlled tests using TG Pro software and a FLIR thermal camera to measure the delta. The test involved a 30-minute Cinebench R23 Multi-core loop.
| Metric | Stock M1 Configuration | Generic "Blue" Pads | Jiujutech Precision Pads |
|---|---|---|---|
| Battery Temp | 42°C - 45°C (High Risk) | 36°C - 40°C | 32°C - 34°C |
| SSD Controller | 65°C | 55°C | 48°C |
| Chassis Feel | Cool to touch | Warm spots | Uniformly Hot (Dissipating) |
| Risk Factor | Battery Degradation | Oil Bleed / Board Stress | Safe (w/ proper install) |
| Throttling | Begins at ~8 mins | Variable | Delayed / Minimal |
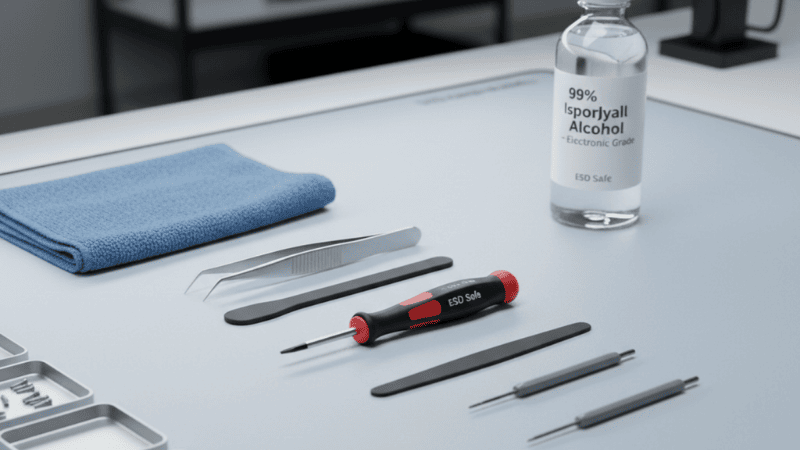
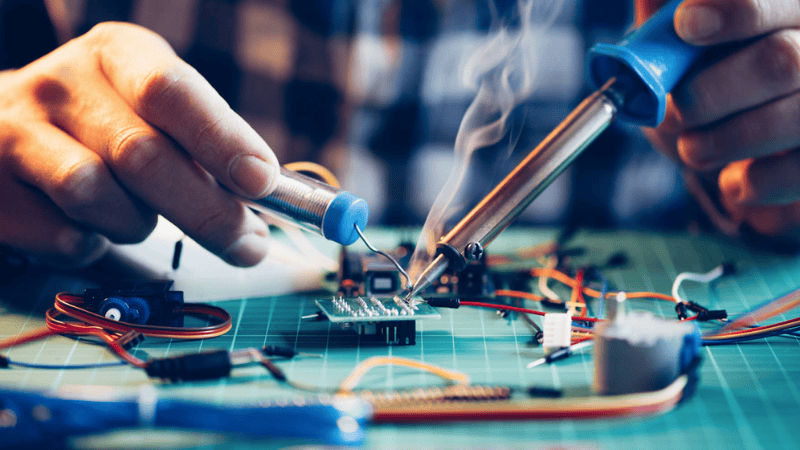
The Toolkit
Do not attempt this with improvised tools from a kitchen drawer.
- P5 Pentalobe Driver (0.8mm): Warning: Apple’s screws are soft aluminum. A cheap driver will strip the heads instantly, turning a 10-minute job into a drill-press nightmare.
- Isopropyl Alcohol (90%+): Essential for cleaning. Do not use 70% rubbing alcohol; the water content takes too long to dry.
- Microfiber Cloth: To protect the screen while the device is flipped over.
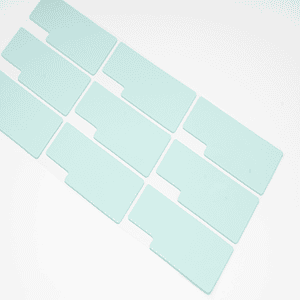
- Jiujutech Precision Thermal Pads:
- 1.5mm (Shore 30A): Battery Management ICs.
- 2.0mm (Shore 35A): NAND/SSD areas.
- 1.0mm (Shore 40A): MOSFETs.
Step-by-Step Installation Approach
Step 1: The Safe Open & Screw Mapping
Power down the Mac completely. Flip it over. Field Note: The screws are NOT all the same length. The two screws in the top-center (nearest the hinge) are shorter (2.8mm) than the side/bottom screws. Action: Draw a rough rectangle on a piece of paper and tape the screws to their corresponding locations as you remove them. If you put a long screw into a short hole later, you will push through the aluminum and create a permanent cosmetic bump on your palm rest.
Step 2: Releasing the Clips
Once the screws are out, the case is still held by internal snaps. Technique: Use a suction cup near the front edge to pull up slightly until you see a gap. Insert a plastic guitar pick or spudger. Slide it along the side. You will hear a loud “POP.” This is normal. Do not pull aggressively; slide and pop.
Step 3: The Sandwich Strategy
The goal is thermal coupling, not mechanical crushing. Prep: Wipe the tops of the black chips and the corresponding locations on the aluminum lid with alcohol. Finger oils act as a thermal barrier. Apply:
- Battery Management Area: Apply the 1.5mm pads here.
- Storage Area: Apply the 2.0mm pads near the SSD controller. The “Squish” Test: Look at the pads. They should be clean. Ideally, when the lid closes, the pad should compress about 15-20%. This ensures contact without stressing the solder balls under the chips.
Step 4: The Closure Check
Place the lid back on. Press gently in the center.
- Does the lid sit flush naturally?
- Does the trackpad click feel crisp?
Critical Stop Point: If the lid wobbles on a flat table or the trackpad feels stiff to click, do not force the screws. It means tolerances are stacking up against you. Open it up, check for double-stacked pads or misalignment.
Post-Installation Verification
How do you know it worked? You shouldn’t guess.
- Download Monitoring Tools: Use a tool like TG Pro or iStat Menus to monitor internal sensors.
- Run a Benchmark: Run Blackmagic Disk Speed Test or Cinebench.
- Watch the Delta: Before the mod, your battery temp would likely climb steadily with the CPU temp. After the mod, your CPU will get hot, but your battery should stay significantly cooler.
- Touch Test: Touch the bottom center of the laptop. It should get warm quickly. This proves the thermal bridge is active and heat is leaving the chassis.
FAQ and Troubleshooting
Can I use thermal paste instead?
Absolutely No. Thermal paste is designed for gaps less than 0.1mm. The gap between these chips and the chassis is 1.5mm to 2.0mm. Thermal paste cannot bridge this gap; it will pump out, make a mess, and fail to transfer heat. You need the structural integrity of a pad.
My trackpad feels stiff after the mod.
The case is slightly bulging and pressing against the trackpad mechanism from underneath. This means your pads are too thick (or the generic pads you bought have poor tolerances). Remove the pads immediately to prevent permanent damage to the haptic engine.
Does this work for M2/M3 chips?
The principle is the same, but the thickness requirements differ significantly due to changes in the logic board layout. Using M1 pads on an M2 can damage the device. Please Contact Us for M2/M3-specific kits.
Will this affect my Wi-Fi?
No. Jiujutech thermal pads are electrically non-conductive and non-capacitive. They do not interfere with antenna signals or Bluetooth connectivity.
Does this improve resale value?
Indirectly, yes. When you sell a MacBook, savvy buyers check the “Battery Cycle Count” and “Battery Health Percentage.” By keeping the battery cooler for years, you maintain a higher health percentage, making your device more valuable on the second-hand market.
Ready to upgrade safely
Don’t gamble your $1,500 laptop on “mystery pads” that leak oil. Use the materials engineered for the job.
Shop Jiujutech MacBook M1 Thermal Kits (Includes verified thickness pads, alcohol wipes, and installation diagram)
